Showing posts with label vegetative. Show all posts

Welcome to Metal Grow Solid

If you want to learn how to cook and grow the best Cannabis around, this is the place. If you want in depth articles for both the advanced and novice growers/cookers, this is the place. Let TehBosh lead you toward the results you truly desire. Enjoy your time here at Metal Grow Solid. If you want to learn more about TehBosh, you can check out his ABOUT section near the top of the page. All of his articles are on the right side of the page. If you want to contact him, his e-mail is tehbosh@gmail.com. Thanks for visiting and enjoy your stay.

ScrOG (Screen of Green) Explained

Why use the Screen of Green method?
The screen of green (ScrOG) technique of growing is used for its efficiency, even canopy for equal light penetration, and ability to use less plants. Scrogging can be done on indoor or outdoor gardens.

What is the ScrOG method?
The ScrOG method is done by using a netting system (chicken wire, fencing, strings, wood, etc.) and putting them over the tops of the plants. The plants are then in vegetative growth until the growth reaches the netting. Once at the netting, the plants are manipulated into filling out as much of the screen as possible.

 (A fence is completely filled out with multiple bud sites, which in turn creates more colas.)
(Thanks to Las Fingerez of rollitup.org for this photo.)

How to ScrOG:
Once you have your netting set up above the canopy of your plants, keep them in vegetative growth until the growth shoots start reaching the net. Once they are tall enough, start bending all of the growth shoots throughout the screen so it fills it out.

Like so: 

(Each growth shoot was bent to one part of the screen to allow other sites to grow.)
(Thanks to Rotten Egg of grasscity.org for the photo.)

From underneath:

(Each branch is grown until it is tall as the screen and then manipulated to fill it out.)
(Thanks to RaceFan of 420 Magazine for this photo.)


(Las Fingerez of rollitup.org uses miniature netting for individual plants to maximize growth. Very ingenious!)

Advantages of the ScrOG technique:
  • It is efficient, as it will maximize yield from a single plant by giving multiple tops and bud sites.
  • This is a good method for people who have plant limits or spacial issues and want to maximize yield.
  • If done correctly, ventilation could become less of an issue, as more air is getting through more of the plant.
Disadvantages of the ScrOG:
  • There is a considerably longer vegetative growth time, which elongates harvest.
  • It can be time consuming and tedious for some.
  • If not done properly, branches could snap and ventilation could become an issue.
Scrogging is definitely a method that maximizes yield per plant and can pay off if done right. It might be time consuming and the veg time might be more, but the ScrOG method is worth experimenting with. 

TehBosh

Increase yield with FIMing.

This is a write up by a user at rollitup.org name MBlaze and this is his tutorial on how to FIM a plant for multiple growth sites which results in higher yield.

"After seeing and hearing many questions about the FIM method I decided to do a tutorial on this method to show exactly how it is done and the results that can be achieved.

FIM stands for ''F**k I Missed'' and I'm not sure how it got that name because it's very simple to do. I use this method all the time to help create a wide canopy with many branches and colas. Some people FIM each plant more than once to create even more colas and branches and it works very well for them and has very minimal stress on the plant.

I usually FIM plants when they are between 1-2ft tall and it should be done at least 2 weeks before turning to 12/12 to maximize the growth potential of the new shoots and maximize the benefits of using this method.

#1 Locate the very top of the new growth.


#2 With a clean, sterilized scissors, Fold the fan leafs over and cut approximately 80% of the new growth off the plant.


#3 This is what it should look like after the cut has been made.
 

 #4 View of the Cut section after 2 days growth, showing the 4 new growth shoots (branches).


I sometimes dont even use scissors and I just pinch out some of the new growth with my fingers. Heres a few pics of another plant that I pinched with my fingers. This plant has been neglected throughout its short life so far and it has been sitting under a shitty fluro light so it would be doing much better under some decent lighting and better conditions but it gives you an idea of the early progress. 

You can see the dot where the FIM was done.


(4/6/09) Now you can see how many new shoots have started to form and you can get some idea of how many main branches this plant will have. Remember that this plant has been under a Flouro light so the growth would be even better under some decent lights.


This is the difference between FIMming and Topping:


Heres a few pics of the later stages of a single FIMming and what it can do."


 (Original post made by MBlaze of Rollitup.org. I (TehBosh) take no credit for the creation of this post, rather show it to others.)

Help your plants grow with your bladder!

(THANKS TO BUDDYNUGS AT HG420.INFO FOR THIS WRITE-UP) 
 (You can grow a plant like this with just some water and your bladder.)

Can I use My Urine as a Fertilizer?
Sure you can. In fact Sweden has tested a full scale urine ‘recycling’ program. Among their findings they have discovered that urine is a complete fertilizer for farm use, lowers the environmental impact of wastewater, improves recirculation of the 3 main nutrients, and that the hygienic risks are negligible if handled properly. Nature has been making use of urine for centuries before humans had even mastered the art of agriculture. Animal wastes contain nutrients that plants needs, and in return they provide us with nutrients we need. It is a circle that has been broken only in recent years, but before you go using your pots as a urinal you will need to be aware of how to use your urine. DO NOT PEE DIRECTLY ON OR AROUND YOUR PLANTS. You will burn them. The following will detail everything that you need to know to be successful.


Use in Soil
Pure concentrated urine will burn your plants; it must first be diluted with water. Typically a ratio of 1 part urine to 10 parts water is effective. Some have gotten away with a slightly higher ratio on unusually hungry girls. It is recommended that you do not exceed 1:10, even though a nutrient burn with urine is rare, the smell can be unpleasant, and salts will build quickly, at higher concentrations. For younger plants start with a ratio of 1:20-1:30 and work your way up. As always do not fertilize germinating seedlings. Wait until the cotyledons (little round leaves) have fallen off before beginning any fertilizer regiment. Also it is not needed every water, every other or every third is sufficient. Let your plant do the talking, if she is a nice dark green then lay off a little, use a weaker solution and lower frequency, if she is getting on the yellow side then step up the strength a bit. Note: Urine can have a high salt content, depending upon your diet. I recommend that when you water with plain water, you allow some run off (approximately 1/8-1/4 volume of your pot) and toss it, this should rid your soil of excess salts.


Use in Hydro
About 8 ounces (1cup) for every 3 gall or reservoir water has been effective (thanks foto) but you should adjust according to your conditions, plant needs, and smell issues. The nitrogen in urine (ammonia and urea) must first be consumed by bacteria as food. The bacteria then store the nitrogen in the bacterial protoplasm. As the Bacteria die, they liberate the stored nitrogen as nitrate, sort of like a time release capsule, to be taken up by the plants. In soil this is no problem but in hydro setups there may not be enough bacteria culture to breakdown the urea and ammonia. Therefore it will be a good idea to drip your Res water through a porous material that can support a bacteria culture such as lava rocks, ceramic bio filter material, foam, sponge. It is up to you; it does not need to be fancy just able to support beneficial bacteria. This step may not be required if your root mass is large enough or if you have a trickle system through a porous medium like rockwool or coco. To get a good start on your bacteria culture you can get some bio-filter booster liquid from any aquarium shop. This liquid contains "good" bacteria that will help you develop a thriving population use as directed (usually a few drops per gal.)
(Urine is a great fertilizer for vegetative growth of your cannabis plants.)


Nutrient Levels (approximation, will vary according to diet)
Alanine, total ..... 38 mg/day
Arginine, total ..... 32 mg/day
Ascorbic acid ..... 30 mg/day
Allantoin ..... 12 mg/day
Amino acids, total ..... 2.1 g/day
Bicarbonate ..... 140 mg/day
Biotin ..... 35 mg/day
Calcium ..... 23 mg/day
Creatinine ..... 1.4 mg/day
Cystine ..... 120 mg/day
Dopamine ..... 0.40 mg/day
Epinephrine ..... 0.01 mg/day
Folic acid ..... 4 mg/day
Glucose ..... 100 mg/day
Glutamic acid ..... 308 mg/day
Glycine ..... 455 mg/day
Inositol ..... 14 mg/day
Iodine ..... 0.25 mg/day
Iron ..... 0.5 mg/day
Lysine, total ..... 56 mg/day
Magnesium ..... 100 mg/day
Manganese ..... 0.5 mg/day
Methionine, total ..... 10 mg/day
Nitrogen, total ..... 15 g/day
Ornithine ..... 10 mg/day
Pantothenic acid ..... 3 mg/day
Phenylalanine ..... 21 mg/day
Phosphorus, organic ..... 9 mg/day
Potassium ..... 2.5 mg/day
Proteins, total ..... 5 mg/day
Riboflavin ..... 0.9 mg/day
Tryptophan, total ..... 28 mg/day
Tyrosine, total ..... 50 mg/day
Urea ..... 24.5 mg/day
Vitamin B6 ..... 100 mg/day
Vitamin B12 ..... 0.03 mg/day
Zinc ..... 1.4 mg/day


Approximately 2 liters is excreted a day.

Human urine is a great source of auxin, in fact one of the most potent auxins can be found in human urine; indol-3-acetic acid or IAA. Among many things auxin is known to stimulate flower growth, promote ethylene production, and stimulate root growth.

I have gone though an entire grow using urine without any deficiencies, but many feel that during flowering your phosphorus levels are too low. If you desire, a bloom fertilizer may be used in tandem during the flowering phase.

A tea made with the Russian comfrey plant (3.6-1-10.6) is an excellent organic bloom fertilizer for those of us who do not wish to use chemicals at any step. Also a tea of bone meal, or bone meal in your soil mix is probably the best way to add Phosphorus.

In addition I would, and have, cut back on the amount of urine used in the flower period (both frequency and concentration). There is some evidence that Nitrogen in excess will inhibit flower growth, and increase your 12/12 time.

Your body can only absorb about 10-15% of a multivitamin/mineral pill the rest is flushed out with your urine. Taking a multivitamin/mineral about 3 hours before your urine collection can give you many vital micro nutrients.

A balanced and healthy diet means balanced and healthy urine. Keep fit and eat well and you should have nutrient rich urine and happy plants.


PH
The PH value for human urine can range anywhere from 5 and 8.5 but most often is found between 5.5 and 7.5 in healthy individuals with a balanced diet. A value of 6 is average. High protein diets can lower PH (more acidic) and Vegetarian diets raise PH values (more alkaline). Urinary infection will increase PH value. Test your PH and lower it (coffee, lemon juice, or vinegar are great organic PH downs) if any higher that 6, especially if in a hydro system, or increase your protein consumption. If the soil you are using is fairly acidic, like peat moss you will want to make sure you are not dropping it too low with acidic urine; dolomite lime can help you buffer this up, or increase your vegetable intake and lower your protein.

Pro's:


It Works
Tried and true. In my (and a few others) opinion it works as good as commercial fertilizers when used properly. A side by side clone to clone test has not yet been done (to my knowledge), but there is no question that urine produces healthy, frosty, dank nugs, as good as anything out there.


Cheap
You can't beat free can you? Not likely. Weather you are growing for pleasure or profit saving money is something that I think we all desire. If you have no problem with spending the money, then go right ahead. Call it ghetto if you want, I call it natures gift, and I intend to make the best of it.


Available
It’s like fertilizer on tap. No hasty visits to the hydro/garden shop. No “I’ll have to do without for a while”. It’s always there when you need it.

Environmentally friendly

Many of us would like to preserve the earth. Well organic fertilizers are the way to go if this is part of your ethos. Chemical fertilizers are produced from petroleum products, natural gas, and coal. Minerals are made more soluble with acids. After the compounds are used by the plant the contaminants left over in the soil can become poisonous and over time can leave the land depleted and ‘dead’. Using organic fertilizers closes a cycle of life that has existed for millennia. We feed the plants and they feed us, much like the oxygen and carbon dioxide cycle.


Compost
Urine in your compost pile is probably the best way to get extra Nitrogen into your mix.


Con's:


Salt content
Human urine will contain various salts. Depending on diet your urine can contain up a max of 2.2% salt, this is because the human kidney cannot concentrate salts to greater than 2.2%. On average salt content will be about 30g/L Total dissolved solids constitute about 5% of urine volume. As previously stated it will be to your benefit to allow some run off when watering and toss it, this will rid your soil of excess salts.


Infections and parasites
Hygienic risks are negligible, unless the urine comes in contact with pathogens after leaving the body. The urine of a healthy person is sterile in the bladder. If you have a urinary tract, or kidney infection your urine will contain bacteria that can infect others. It is quite impossible for the infection to be passed through the plant, bud or smoke. If you are sick the majority of pathogens that can transmit disease will die within 24 hours of leaving the body. Infections will increase both your salt content and PH values, and can contain bacteria that consume nitrates.


Imprecise
Urine fertilizing is not an exact science. Exact nutrient levels and concentrations cannot be accurately established without the proper equipment. Notwithstanding some trial and error is necessary in every fertilizer regiment. Certain strains can have differing tolerances, different growing conditions and methods vary in their ability to deliver nutrients reliably.


(Photos courtesy of TehBosh)

Nutrient deficiency / Overdose of Cannabis Explained.

I found these informative scans of a book about nutrient problems dealing with Cannabis. Thanks to Klutter of Grasscity.org for providing these.

This information is a must so you do not over/under fertilize your precious plants.

Get to Germinating already!


(A beautiful seed almost ready to be plucked and germinated!)


1. First, make sure that the seeds themselves are of quality. In other words make sure they are a reasonable size, not small like a pea of couscous. Some seeds aren't brown, but most seeds that are pale green and near white didn't have time to fully develop their genetics, so it might have a harder time to germinate, not to mention it has a better chance of being a male. Make sure the seed is hard and not easily smash-able. Also make sure the little knotted hole at the bottom of the seed is not damaged, as in it has a perfect circle volcano like depression.


2. When you think you have some good seeds to germinate, you have the option of "scraping" the outer layer of the seed a little to make it easier to absorb water. You do this simply by getting a nail file and gently brushing it on the surface of the seed a couple times. There are other ways to scrape seeds. But in reality, you really don't have to do this. As long as you picked decent seeds, they will germinate. Marijuana seeds retain genetics and germination capabilities far after they are initially created; several years in fact.


3. If you chose to scrape the seeds or not, prepare to germinate by getting a paper towel that you can fold a few times. Before you fold your paper towel, lightly soak it with water to where it's wet, but not ripping. Fold the towel a few times to where it's thick enough to snugly fit the seeds into the last fold. After folding to this point, soak the towel again, but with a little more water and gently squeeze the excess water out.


4. With your seeds, place them into the towel so that they are submerged in the wet paper towel. Make sure there is enough water for the seeds to absorb. It would probably be easier to unfold the towel first, put the seeds on one side of the two sided towel and then fold the other side down snugly and securely.


5. Once the seeds are in the towel, put the towel in a dark place to where no light can reach it. Make sure to put the towel in a mug or something that won't allow it to get outside particles in. Place it in a dark area, to where no light can reach it and leave it alone. Check every 6 hours or so to make sure the paper towel is still damp and re-wet it if it dries up. Check the seeds in 24-48 hours and they should have had tap roots develop and pop out of the seed.
(These seeds are definitely ready to be planted.)


6. When ready to plant the seed, place the seed with the tap root facing down into your medium and cover it with about a little less than 1/8 inch of soil. You want light to reach the surface of the seed to help it complete its germination stage. Be sure to keep the medium nice and moist to give the little seedling its life. After a few days the seed will crack and develop its first set of leaves. After that, just keep them watered and they'll be growing into trees like no time. Just be sure to keep the light on them for at least 16 hours during the 24 hour day.
(A germinated seedling that is on it's way to full on vegetative growth.)


TIPS:
  • You don't have to germinate seeds with a paper towel. You can simply put seedlings in a cup of water and put them away for 24-72 hours. However, the paper towel method in my opinion, gives you a more successful germination rate.
(All photos in this article are from images.google.com)

Perpetual harvests of cannabis in more detail.

This article is how to have a constant harvest of medical marijuana for a steady supply of medicine for patients with ailments. Keep in mind this is the absolutely bare minimum number of plants being used and assuming the plant flowers in 8 weeks respectively. This method makes it work for 1 plant every week making 9 plants the minimum for a perpetual 1 plant a week harvest.


MATERIALS:
• A Vegetative stage grow room.
• A Flowering stage grow room.
• Sufficient lighting (florescent lights, CFL's, High Pressure Sodium, Metal Halide, L.E.D., Sulphur Plasma, any of these lighting sources will work.
• Proper ventilation.


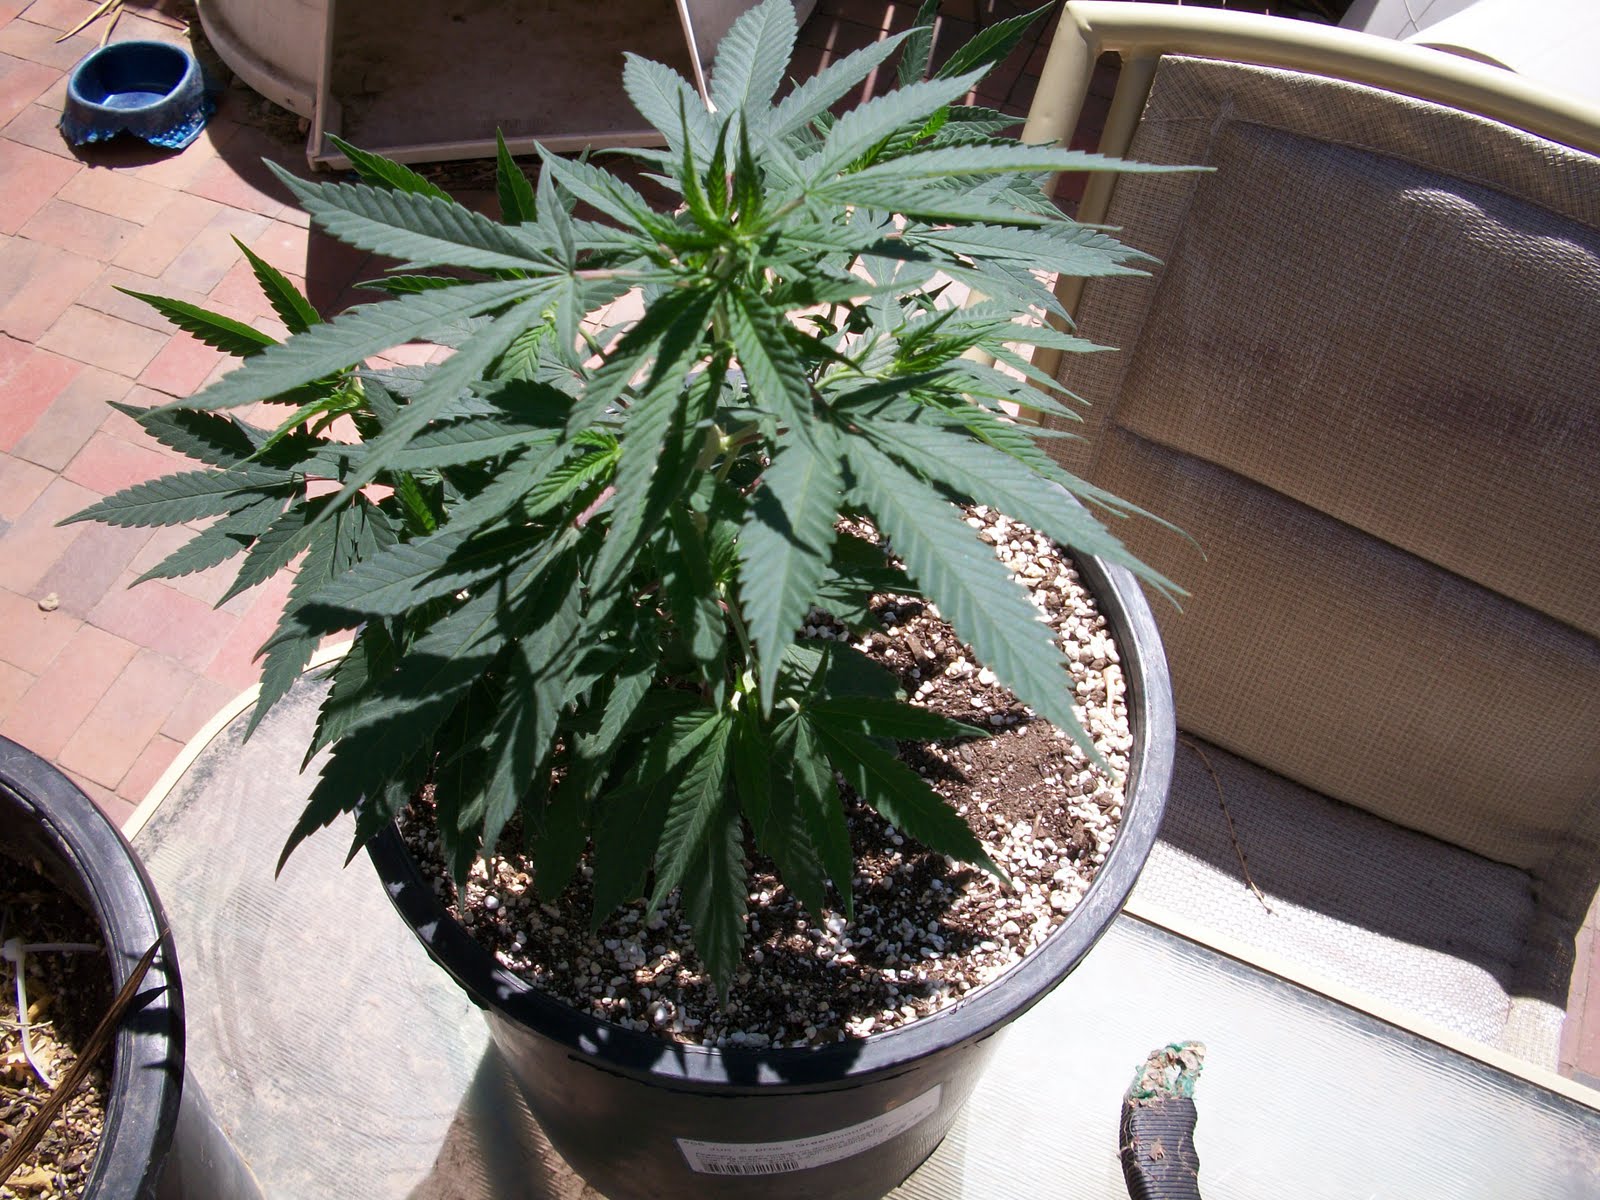
(A young Super Skunk clone in vegetative growth. You can grow one out like this and clone it 8 times to be on your way to a harvest a week!)
1. Start a batch of at least 9 seeds, or preferably a batch of 9 clones in the vegetative grow room. Growers prefer florescent or metal halide lighting in the vegetative room because the spectrum of lighting these types of lights produces mimics the spring and summer spectrum of the sun outdoors. This promotes healthy growth, with minimal stretching (as long as the light is as close to the plants as possible without burning the actual plant). Whatever your medium you grow in, make sure the environment is like the outdoors, with the plants having a constant supply of co2 when the lights are on. Vegetative stages of marijuana plants mean they have a constant supply of light either 24 hours on, or 18 hours on 6 hours of darkness.
2. When the plants have passed the germination stage and are growing in the vegetative stage, the grower has the option to put them in the flowering stage whenever they deem the plants are big enough to produce enough medicine. Grow the plant to desired size, and when it's ready to flower put the desired plant (singular) into the flowering chamber.


(I could flower this plant, but I want to clone it first.)
3. In the flowering chamber, the light schedule dictates that the plants will have less light during the 24 hour day to build their reproductive parts. Growers prefer High Pressure Sodium bulbs or florescent with more of a orange spectrum. The orange spectrum mimics the sun during the fall and late summer. The sun sets faster and faster towards fall which makes outdoors darker for longer over time. The flowering chamber usually has the lights on for 12 hours, and then 12 hours of lights off. This is when the plants produce their flowers.


(Early flowering (about 4 weeks to be exact)).
4. If you have one plant in the flowering chamber and 8 plants in the vegetative chamber, then you can always have one "mother plant" in the vegetative room to make clones off of. With the other 7 plants, however, you will put one plant in the flowering room every week, and also taking a clone every week to replace the clone you just sent to flower. One plant in, one plant out. As long as you have a mother that you can take clones off of, then you can have a perpetual harvest. Just make sure the mother plant has more room for her roots, so she can produce hearty, big clones. Whether you do hydro, or soil make sure she has a lot of room to grow.


(A plant minutes before it was harvested.)


TIPS:
• Make SURE that all of your plants are female. Male plants produce pollen and impregnate females to make seeds. Females produce pistils which are found where the branches original growing location is. They are little white hairs that tell you the plant is female. If you see pollen sacks (balls) developing, then you need to take them away from the females. If you are choosing to breed, do it in a separate room away from the sensi flowers.
• Be secure, be safe.
• Have proper ventilation.
• Make sure the plants have an adequate amount of co2 to breathe through their stomata (pores under the leaves).
• Make sure both rooms are on a strict, unchanging lighting schedule, and that no light gets in when it is the dark period for the plants.

(All photos in this article are from TehBosh)
Clone marijuana for constant harvests!

MATERIALS REQUIRED:
* Scissors or a razor blade or both.
* Rooting hormone (Gel or powder).
* Small growing medium container. Either soil, or whatever you use.
* Something to poke hole in medium for clone to go in. A small thin paintbrush will do, or a small pen or pencil.


1. Get all your supplies ready and sanitized. You don't want the plant to get infected where you make the cut because it might not root and die.


2. Find a good spot on the plant to make a clone. Don't clone just a fan leaf. You need to clone growth where it is new and young, with at least two sets of fan leaves. The lower on the plant the clone is taken, the better chance to have it root faster. You can take clones off of near tops of plants, but they will take a little longer to root. Take your razor blade and make a 45 degree angled cut so you can give the base of the clone more room to have its roots grow.


3. Make sure the cutting is big enough and make sure there is enough surface area at the bottom of the stem to grow enough root mass.


4. To give the clone more chance to root, take your razor blade and make a small incision down the middle of the bottom of the stem going up towards the top. Only go about one inch, but this will give more area for the clone to root. This is also optional, you don't need to do this to have a successfully rooted clone.


5. Put it in a glass of water as soon as the cut is made to make sure no air gets to the rooting area.


6. When ready to dip into rooting powder or gel, make sure you are careful and dip the bottom of the plant into the rooting hormone. Make sure to cover the area with enough hormone so it can root. Once dipped, flick the plant or blow off the excess powder or gel.


7. Poke a hole in the soil or whatever medium you're using down the middle of the container. Make sure to make the hole at least 2 inches in depth, but no more than 6 (or however tall your cutting is). Place the bottom of the plant with the hormone on into the hole in the medium. Make sure to pack the stem in the medium nice and firm, and then water to saturate the medium. Also, pack more after to make sure it's firmly in place. MAKE SURE there are no air pockets in the soil where your clone is trying to root. Pack it down and all around.


TIPS:


  • Practice cloning and you will be able to make cutting after cutting to give yourself a constant supply of medicine.
  • Clones don't need a lot of light to root. In fact they prefer less light than a standard vegetative room gives. One 23 watt CFL could root many clones.
  • You don't have to put a humidity dome over the clones, but it helps retain humidity and helps root them. As long as the root area and the medium is at a constant good level of moisture, then they will root.
  • Always make sure you're working in a clean environment and you're working with clean equipment at all times.
  • Be careful with sharp razor blades because they will cut you easily.
  • Don't over water to make the medium soggy, because bacterial growth that is not good for your plants will occur.


GOOD LUCK!
(Photo credits to Cranky of gardenscure.com)